EpoxAcast® 690
说明
Materials should be stored and used in a room temperature environment (73°F/23°C). Elevated temperatures will reduce Pot Life. EpoxAcast™ 690 Resin and Hardener must be properly measured and thoroughly mixed to achieve full, highstrength, solid-cure properties.
Because no two applications are quite the same, a small test application to determine suitability for your project is recommended if performance of this material is in question.
Applying A Release Agent – For releasing epoxy from non-porous surfaces such as resin, metal, glass etc., use Ease Release 200 or 205 (available from Smooth-On) to prevent adhesion.
IMPORTANT: To ensure thorough coverage, lightly brush the release agent with a soft brush over all surfaces of the mold or model. Follow with a light mist coating and let the release agent dry for 30 minutes.
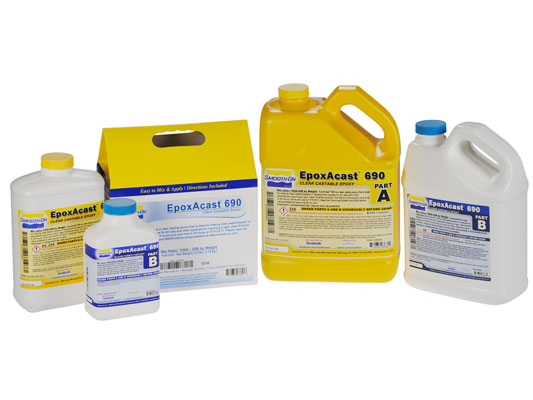
Measuring / Dispensing – The proper mixing ratio is 100 parts of EpoxAcast™ 690 resin to 30 parts hardener by weight. You must use an accurate scale (gram scale or triple beam balance scale) to weigh these components properly. Do not attempt to measure components by volume.
Mixing tools and containers should be clean and dry. Mixing should be done in a well ventilated area. Wear safety glasses, long sleeves and rubber gloves to minimize contamination risk. Combine EpoxAcast™ 690 resin with the appropriate amount of hardener. Mix thoroughly for 3 minutes making sure that you scrape the bottom and sides of the container several times.
Adding Color - EpoxAcast™ 690 can be colored with UVO™ or IGNITE™ colorants or Cast Magic™ Effects Fillers. Pre-mix color or filler with Part A thoroughly and then add Part B.
Mixing – Be sure mixing utensils are clean and free of any potential contaminants such as dirt, dust or grease. Mix Parts A and B thoroughly for at least 3 minutes with a square edged mixing stick. Be aggressive and scrape sides and bottom of mixing container several times. Use the square edge of mixing stick to bring material off of the sides of container and blend. If using a drill mixer, follow with hand mixing as directed above to ensure thorough mixing.
Adding Fillers - A variety of dry fillers can be added. Pre-mix dry filler with Part A before adding Part B.
Pouring – If casting EpoxAcast™ 690 into a rubber mold, pour mixture in a single spot at the lowest point of the mold. Let the mixture seek its level. A uniform flow will help minimize entrapped air. Recommended casting thickness maximum 3/8 in. / 0.95 cm.. Castings that are ¼ in. thickness or less will cure more slowly.
Cure Time: Refer to specified Cure Times in Handling Properties at room temperature depending on mass. Cured material will be hard and unable to penetrate with a finger nail. Cured epoxy can now be dry sanded. If machining or sanding, wear NIOSH approved mask to prevent inhalation of particles. Pot Life and Cure Time values are dependent on mass and mold configuration, as epoxies are mass-sensitive. Let cure for 24 hours at room temperature. Castings that are ¼ in. thickness or less will cure more slowly and may require up to 48 hours to fully cure at room temperature.
Performance: Cured castings are very hard and durable. They resist moisture, moderate heat, solvents, dilute acids and can be machined, primed/ painted or bonded to other surfaces (any release agent must be removed). If machining castings, wear dust mask or other apparatus to prevent inhalation of residual particles.
Castings can be displayed outdoors after painting with an aliphatic urethane clear coat (such as Axalta Imron 3.5 Plus High Gloss Polyurethane Topcoat available at www.johnsonautobodysupply.com). Unpainted castings will yellow after being exposed to UV light or excessive heat above 115°F/46°C. For longer outdoor UV resistance of an unpainted clear part, Smooth-On’s Crystal Clear™ Urethane Resin may be an option for your application.
Because no two applications are the same, a small test application to determine suitability is recommended if performance of this material is in question.
Painting – Cured EpoxAcast™ 690 can be painted and / or primed and then painted with acrylic enamel paints. Let paint fully dry before putting part into service.
Removing Epoxy – Uncured / Non-curing epoxy: Scrape as much material as possible from the surface using a scraper. Clean the residue with E-POX-EE KLEENER™ available from Smooth-On, lacquer thinner, acetone or alcohol. Follow safety warnings pertaining to solvents and provide adequate ventilation.
